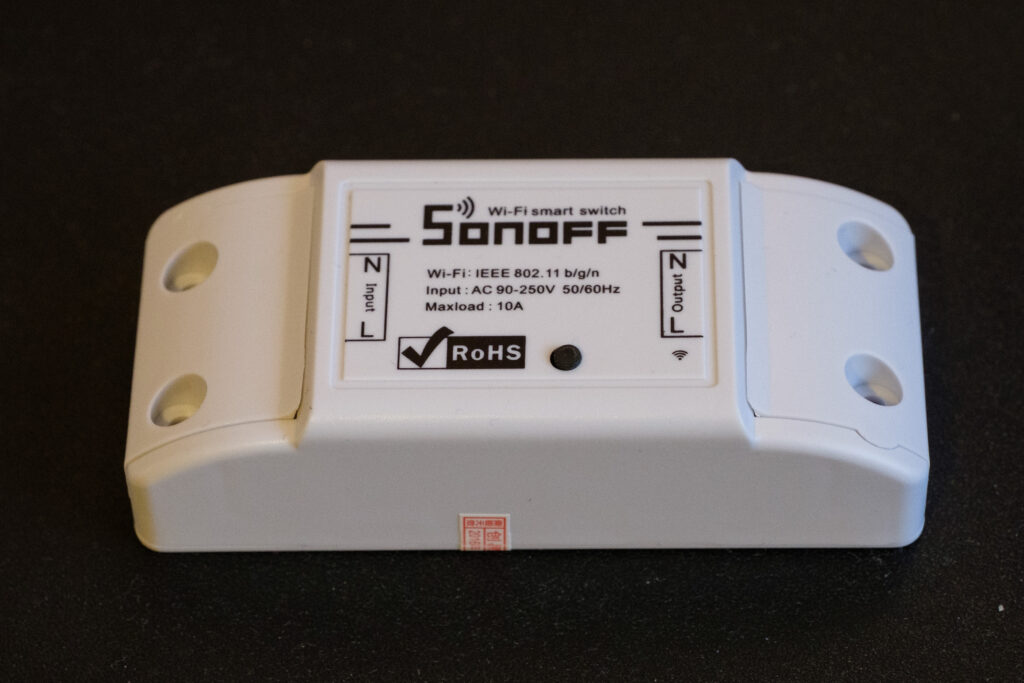
I’ve recently purchased several sonoff wifi modules. Here’s another one, higher amperage. They usually go with an app that you can use to turn them on / off. However, that’s pretty boring 🙂 I decided to make them run via http interface and also control them from Domoticz via virtual switch. Yes, it’s possible and not that hard 🙂
I decided to install ESPEasy, because it’s universal one and you can configure it pretty easy via http interface and dedicated access point. Download R147_RC8 from their site. You will also need Arduino IDE configured and running, and also install ESP8266 module. In the readme you can see how it’s done, I will not repeat it here.
After you install the ESP8266 module, copy all libraries from the downloaded ESPEasy firmware from Source/Libraries to your Arduino’s libraries folder. Depending on your OS of choice, this might be different location. Mine was in the package contents of Arduino app in Applications ( Mac OS X ).
After you do it, open Source/ESPEasy.ino in Arduino IDE. This you will be flashing. Configure your IDE settings. Mine are like this:
Now, press “Verify” button. It should compile successfully. If not – check if you did the things above properly. For flashing, I use cheap PL2303 module. You can see how to configure and connect one of these in another post.
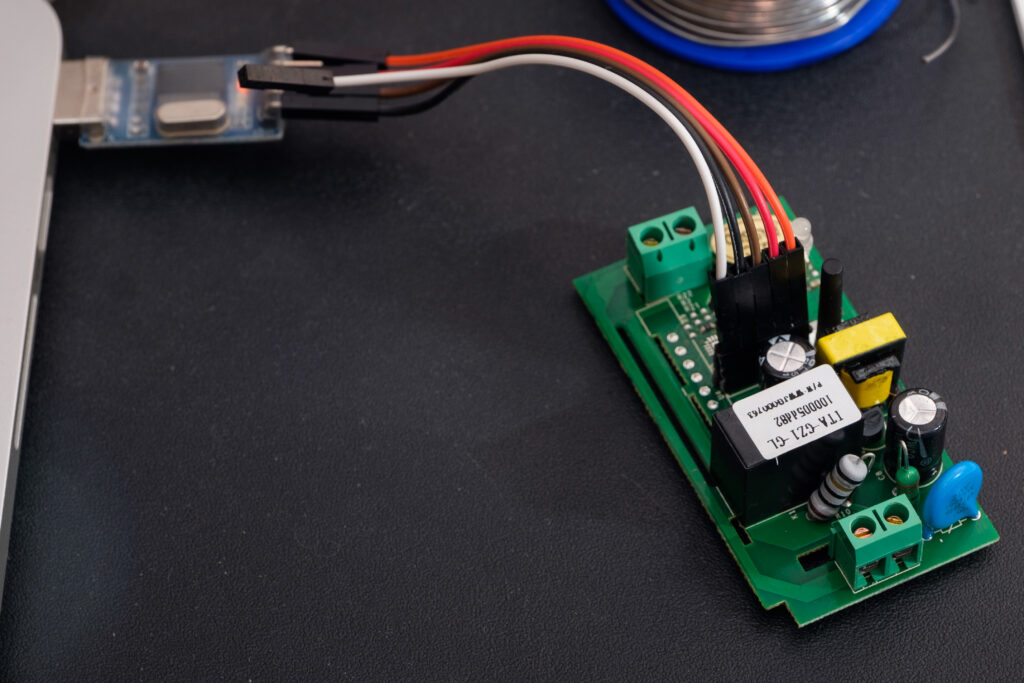
Okay, so now we need a bit of soldering 🙂 There are some holes, which are actually serial pins, power and GPIOs 🙂 Sorry for the ugly overlay 🙂
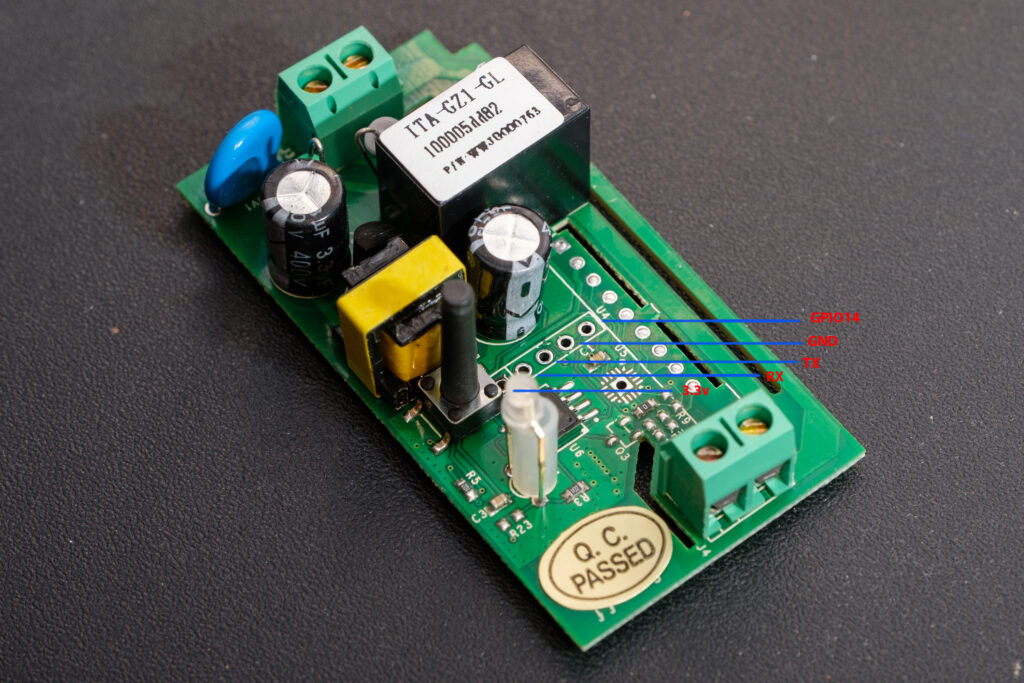
So, we will be connecting the four ports, but I soldered a connector to make it easy for attaching the USB to Serial convertor:
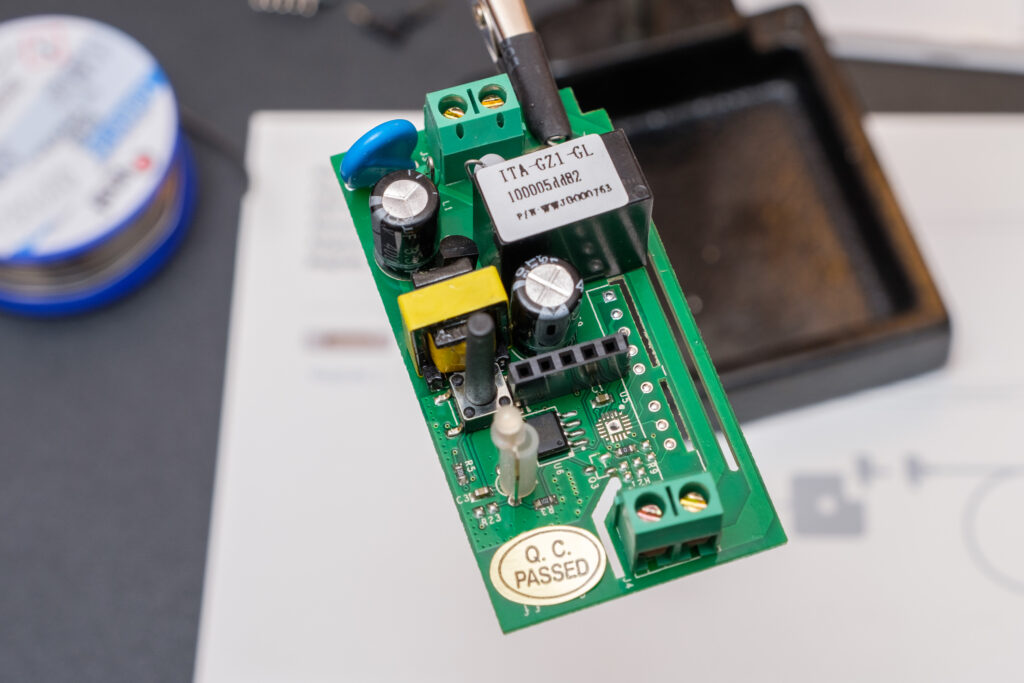
The finished connection looks like this:
Now, in order to boot in program mode, you need to press the button on Sonoff while it’s not powered on, then plug it in the USB port of the computer and then release the button.
NOTE: Make sure you have no power on the input, otherwise you will fry it!
So, configure your port in the Arduino IDE and you’re good to go. When you press “Upload” button, it should start uploading. If it fails with errors about
espcomm_sync failed
this means the device is not in program mode. Retry it again until it works.
After it’s finished, disconnect everything, remove the serial to usb and connect power. Soon you should see a hotspot like ESP_0 or ESP_1. Connect to it. You will be presented with a screen to configure wifi connection. Connect it to your wifi network and restart it. Note the IP address. Mine was 192.168.88.20. Connect to it: http://192.168.88.20/ (use yours, of course) . You should see something like this:

I would suggest to go to “Config” section and configure static IP address, so you always access it on the same address:
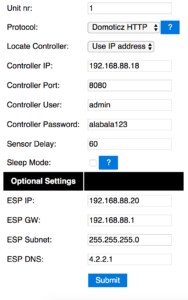
Make sure “Unit nr” is not “0”. You don’t need to configure Domoticz here, as we’ll be using very simple interface to control it.
Okay, so the relay is on GPIO12, and the LED is on GPIO13. Go to “Tools” -> “Advanced” and tick “Rules” check box and then press the “Submit” button. A new main screen should appear – “Rules”:
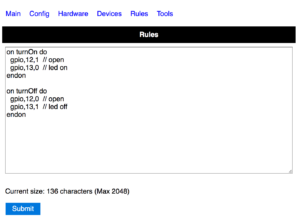
Here’s the script I used ( Note that to switch LED on, you need to send low signal to GPIO13 ):
on turnOn do
 gpio,12,1 // close
 gpio,13,0 // led on
endon

on turnOff do
 gpio,12,0 // open
 gpio,13,1 // led off
endon
Press “Submit” to save it.
So, that’s it 🙂 now you can turn it on when you call URL like:
http://192.168.88.20/control?cmd=event,TurnOn
and turn it off with:
http://192.168.88.20/control?cmd=event,TurnOff

Easy, right? If you create a virtual switch in Domoticz and add the on and off scripts there, you can control it directly.
That’s it 🙂 Probably there is much easier way, I’ve seen several very simple sketches, that do exactly the same, but they are not easy to reconfigure as ESPEasy is. You have to add your credentials in the sketch, and that’s what I didn’t liked.
EDIT: If you want to turn on / off the switch via the button, use the following rules:
on turnOn do
 gpio,12,1 // close
 gpio,13,0 // led on
endon

on turnOff do
 gpio,12,0 // open
 gpio,13,1 // led off
endon

on Button#Value do
 if [Button#Value] = 1
 gpio,12,1 // close
 gpio,13,0 // led on
 else
 gpio,12,0 // open
 gpio,13,1 // led off
 endif
endon
and add a device in “Devices” tab:

With these settings:
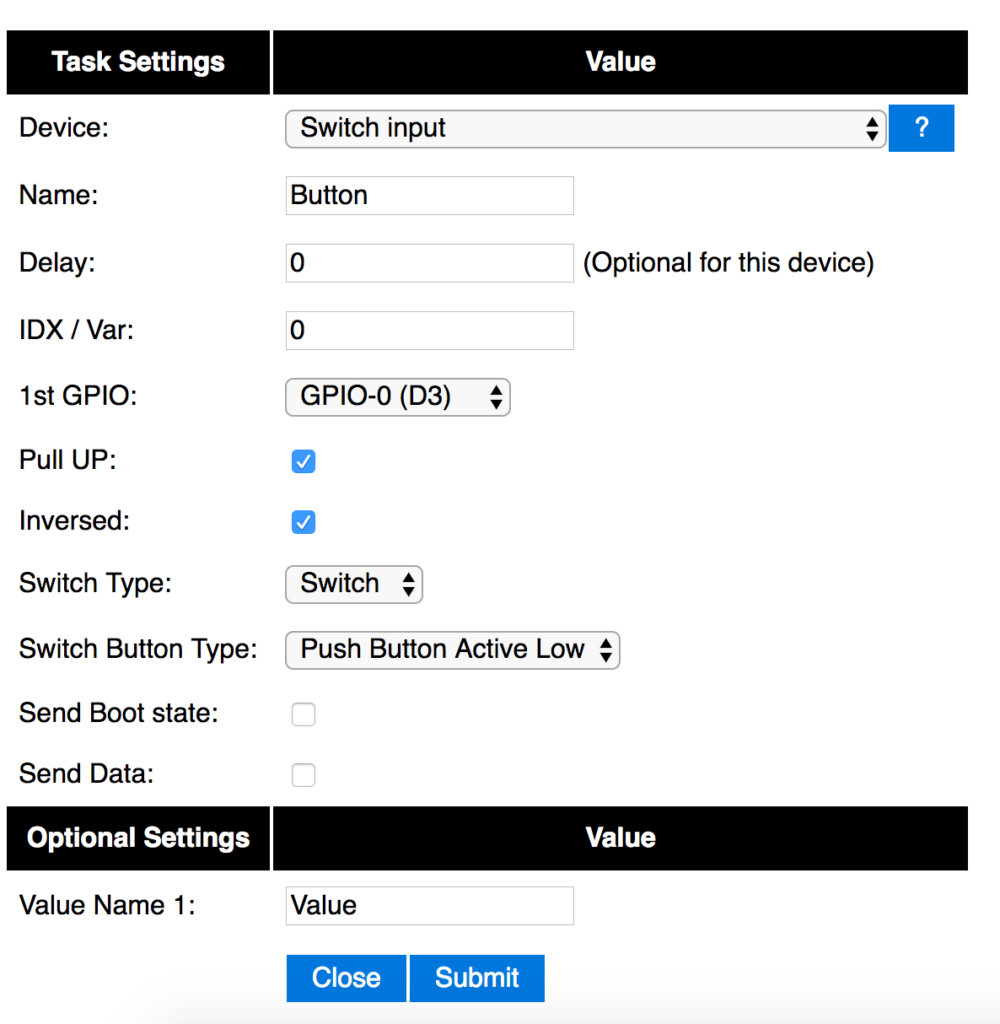
Now, the next time you press the button, it will toggle between On/Off the relay.
Enjoy 🙂
2 comments On Customizing Sonoff ESP switch to work with anything
Hi Wasp,
I got my sonoff’s recently, took one and changed firmware to espeasy. I used the old night lamp and ordered electric cable (OMY 4×0,5 mm) and switch (WP8A05) *naming convention for switch and cable may be country specific. So in the end i have a whole new cable, on cable switch that goes to gpio14 and all in Domoticz. Everything works, but! 🙂 .. when i dont add the turnOn rule to control the lamp from domoticz and use the manual on cable switch it works flowlessly, sometimes just minor almost unnoticable delay. but when I add the rule to switch on the lamp to control it via domoticz i get every third time a double click syndrom it means that when i turn the lamp off i see in domoticz log that two commands were sent, first one off and second one On again so my lamp turnes off and on again with just one click. Do you have any idea how to correct that behaviour?
Hi Wube,
I actually played a bit with Domoticz while ago. However, I found it quite complicated at times and has abandoned it. Probably will give it a shot some day again, I don’t know. For now I’m trying to simplify all the switches and sensors. By the way, why don’t you check ESPurna instead of ESPEasy? I’m switching all my Sonoffs to this firmware. Has great support, much much easier to setup, has API, support for Domoticz, MQTT and more. Highly recommend it.