Haven’t posted in a while. I think it’s finally time to correct this 🙂
I’ve reached a state of stable working home automation system. This is how I did it.
Home assistant.
This is the core of the automation. In the recent years, HASS has become de facto the best free and open-source Home Automation platform.
There are a lot of ways to install it. In order to utilize it’s best potential, I recommend going with HaOS. This way you can have addons, which are crucial for supporting everything you need and possibly want. That’s also base for the current tutorial.
I have currently set-up Home Assistant at two locations:
- At my home, I use HaOS, installed in a virtual machine on Proxmox. The easiest tutorial you can find here.
- On my other location, I use HaOS, installed on the SD card of Raspberry PI 4 ( 4gb version ). Please make sure you use durable SD card, as cheap ones often fail ( happened to me once every 6 months or so, until I figured it out ). Please check this page if you go that route.
Devices
There’s no real home automation possible without any devices, right? I have settled on two main types of devices:
- Zigbee.
- Wi-fi devices – flashed with Tasmota or ESPurna ( If you are new, I recommend going straight to Zigbee-only. If you still want to use wi-fi devices, ESPurna has much nicer interface, but Tasmota has more support – at least from what I can tell).
Zigbee devices are low-power emitting devices, which operate in a mesh in order to improve the signal. In other words – the more zigbee devices you have, the better they work. Did I mentioned that they are also low-powered? If operated on battery, they can often work for more than a year, or at least 6 months on a single coin-type battery.
In order for Zigbee devices to communicate, you need a gateway. No, not the proprietary kind of gateway ( Xioami Mi Smart Gateway or such ). You don’t want that, otherwise you’re stuck with proprietary hardware/software, requiring internet in order to work.
I’ve settled for CC2531 from AliExpress. It’s a USB stick, that you plug into your raspberry pi or in the Proxmox host machine and then passthrough it to the VM.
There are two variants:
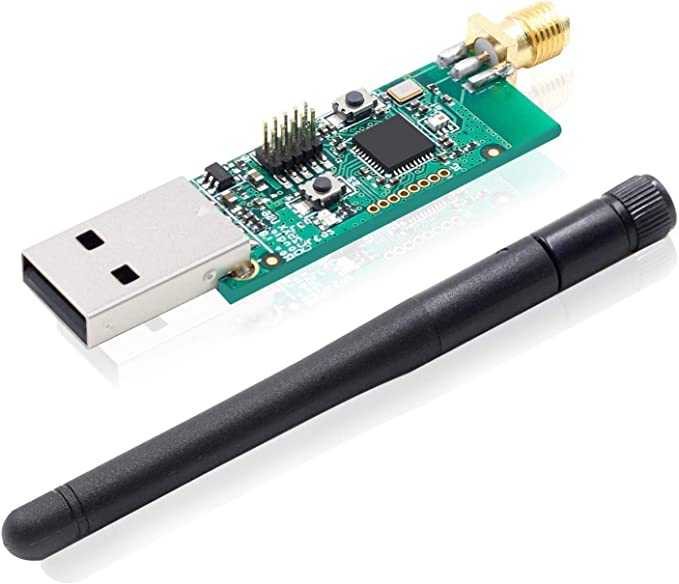
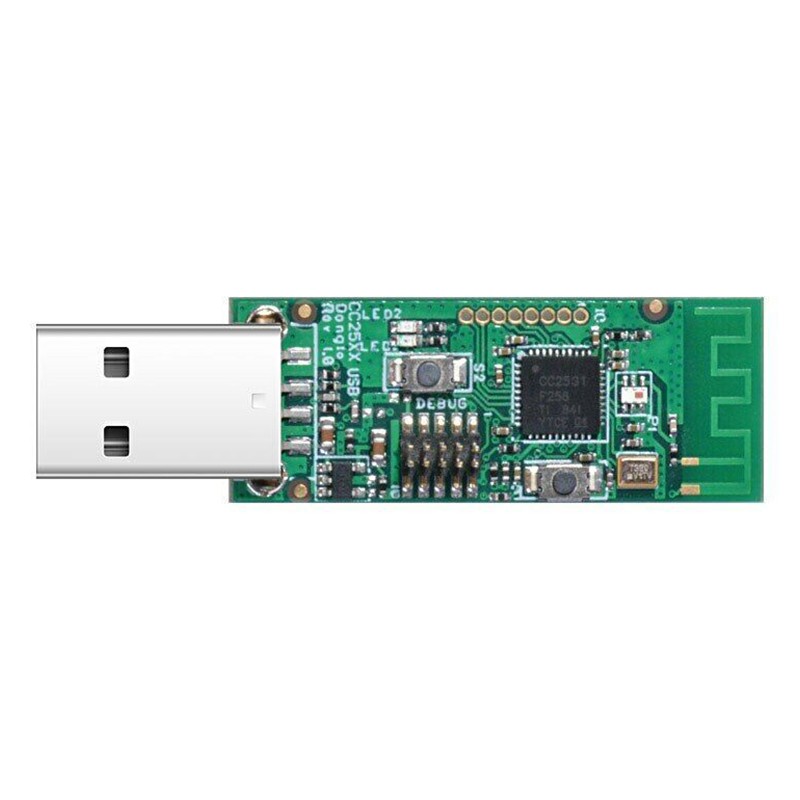
CC2531 needs to be flashed with Zigbee2MQTT (there are others, but I’m using Zigbee2MQTT without any issues, so I’m recommending it) in order to act as a Zigbee gateway. This can be done two ways:
- With a CC Debugger. Great tutorial can be found here.
- Without a CC Debugger, but with Raspberry PI. Tutorial can be found here.
If you don’t want to flash anything and just want something working, I’d recommend Sonoff Zigbee 3.0 Dongle version E. It can be found on AliExpress for about 20-25 EUR.
Essential Addons
In order for everything to work properly, we need several addons. Head to Settings -> Addons on your Home Assistant’s web address, once installed.
We need at least the following:
- Mosquitto Broker
- Zigbee2MQTT
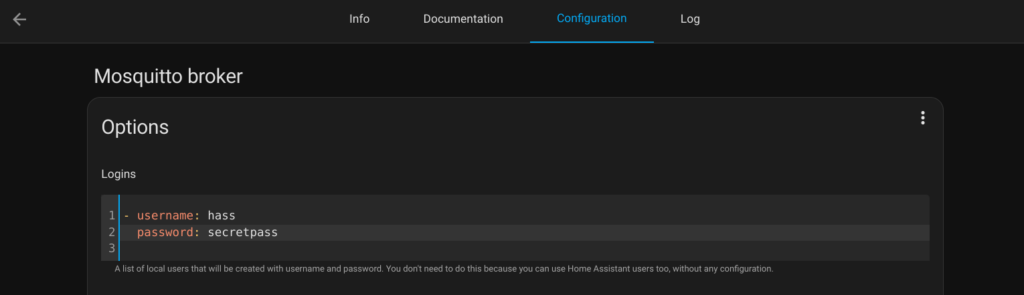
Once installed, configure Mosquitto broker:
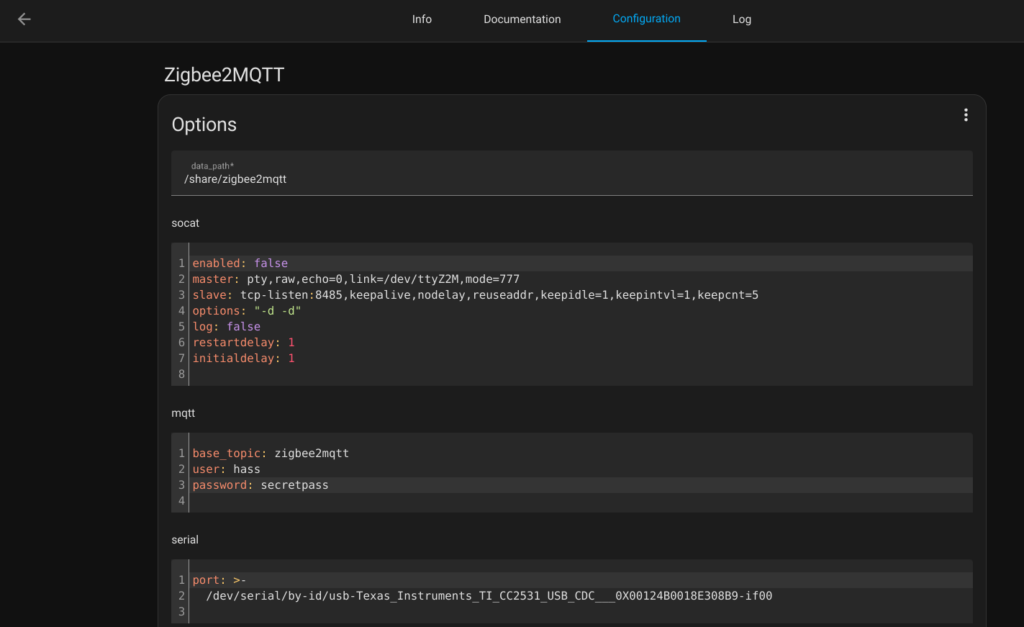
Start the add-on. Then move on to the configuration of Zigbee2MQTT ( make sure the dongle is plugged in ).
Go to Settings -> Add-ons, click Add-on Store, click the 3-dot button and select Repositories. Add https://github.com/zigbee2mqtt/hassio-zigbee2mqtt and click Close. Then select Zigbee2MQTT.
You need to find your device first. Go to Settings -> System -> Hardware. Click the 3-dot and select All Hardware. Then you can search for tttyACM0 or similar and copy it’s id:
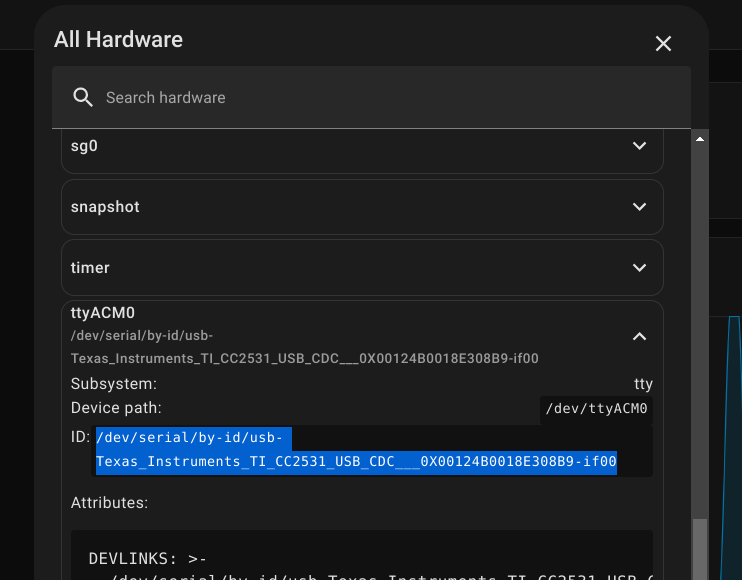
You can start this addon, too. Then go to it’s web interface. Mine looks like this:
Adding Zigbee devices
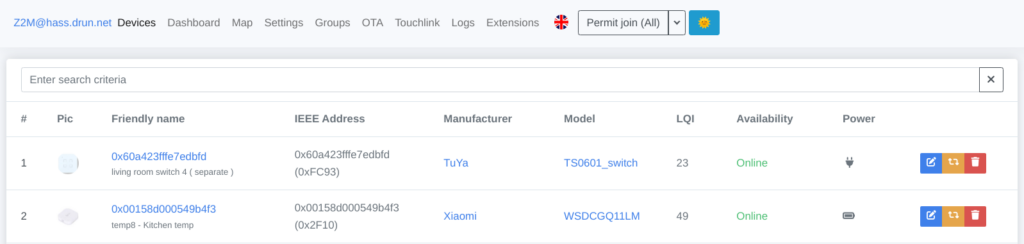
Zigbee devices can be paired with the “Permit Join (All)” button. When pressed, it will allow for devices to join the network. Each zigbee device goes into pairing mode differently, please check yours how to do that. Once paired, it will appear in the interface. Then you can also find it automatically in the Home Asisstant’s devices / entities.
Once added, it will appear in the list. I suggest pressing that blue edit button on the far right side and adding a comment:
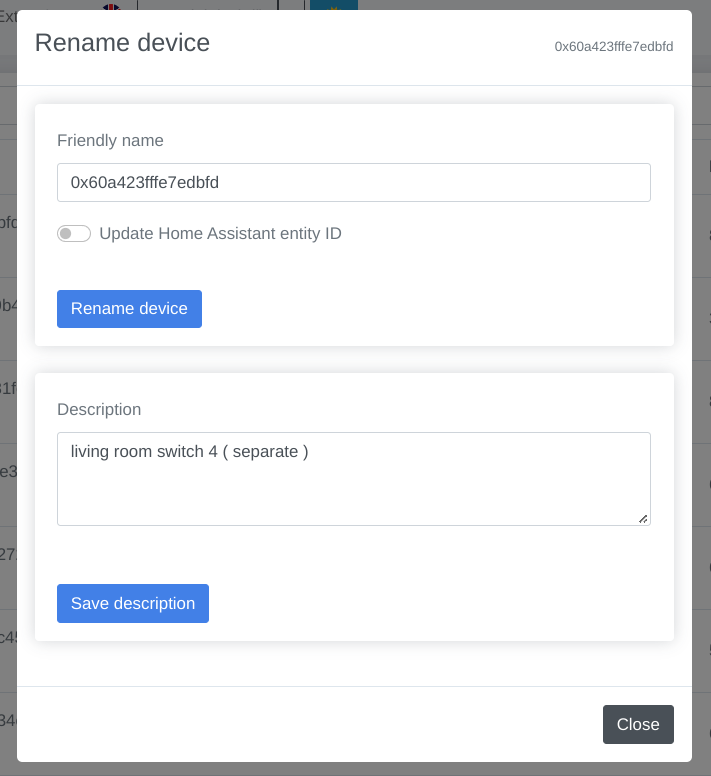
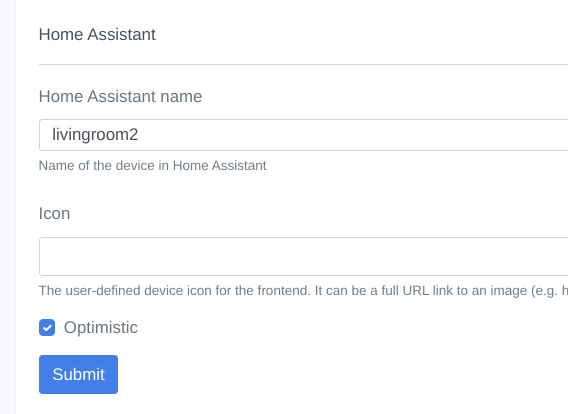
One more thing I recommend doing. Click on the title of the device under Friendly name column and then a screen with tabs will open:

Click on Settings tab, then scroll to the bottom. There you can set Home Assistant friendly name:
Using Zigbee devices in Home Assistant
There are mainly these types of zigbee devices (there might be others, but those I know of) :
- Sensors
- Switches
- Lights
- Other ( water-leakage, smoke detection, etc ) – which can probably go into “Sensors” type, but I have no such devices so far.
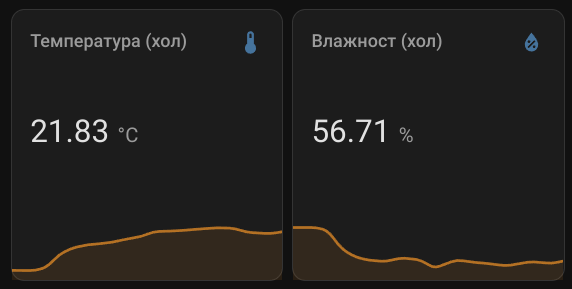
Sensors usually read temperature, humidity, light and can be shown on a Dashboard in Home Assistant or be used in automations ( native or Node Red ).
Zigbee switches can be two types – persistent ( remembering the pressed state ) or push-only. I personally use both.
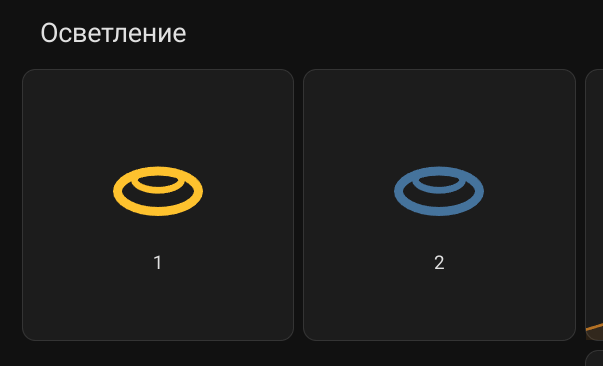
- Persistent type of switches are usually wall switches, connected to mains and do not need a battery, therefore can be always available. Their state can be shown on Dashboard:
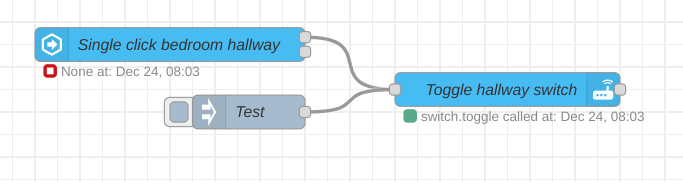
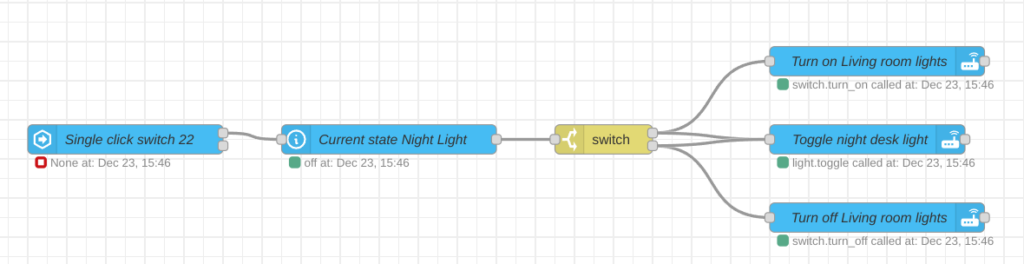
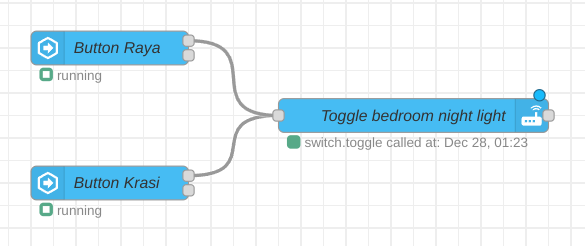
- Push-only switches are useful when you need to perform an action when pressed ( single or double ). I often use these in Node Red automation:
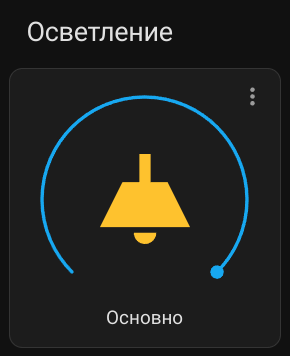
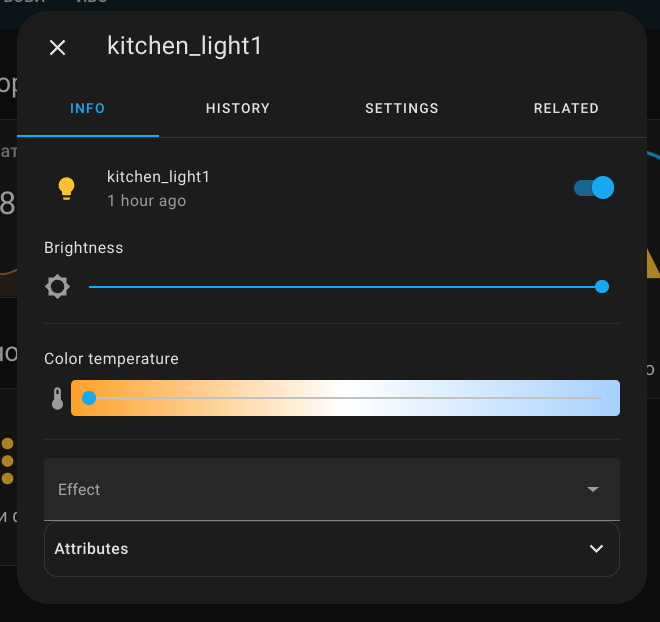
- Lights are like switches, but usually you can control more things like color, warmth, brightness and more:
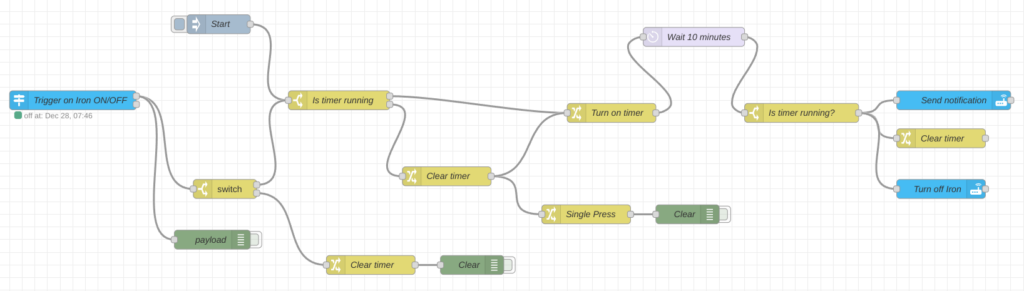
By using Node-Red, you can make complex conditions and make the system work for you as you want it.
vice-versa.
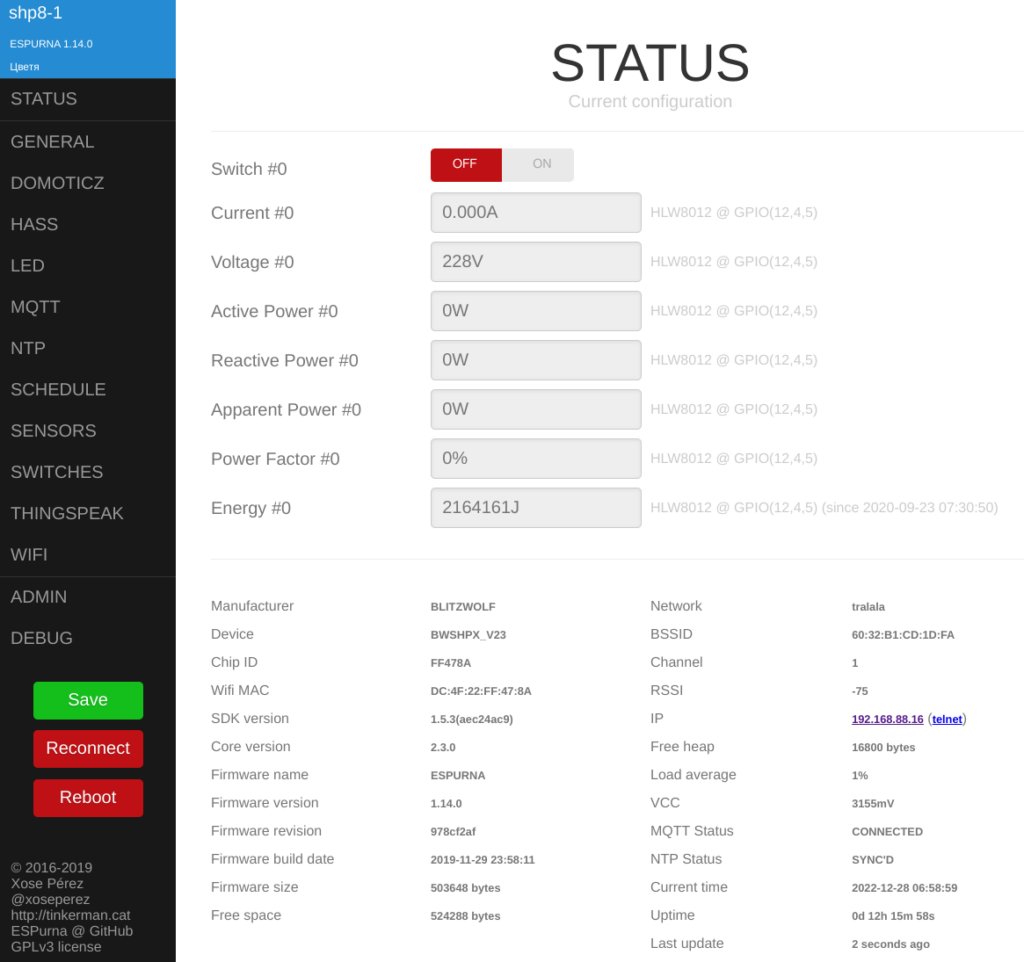
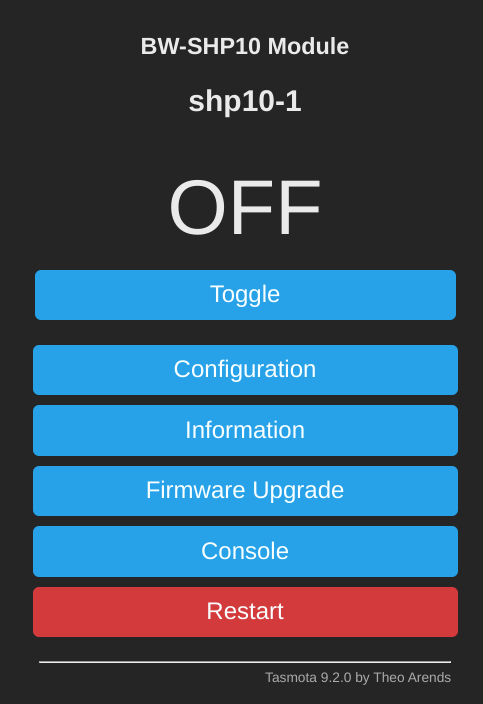
Wi-Fi devices
The wi-fi devices I use are usually Sonoff smart plugs. I’ve flashed them either with ESPurna or Tasmota (depending on the specific device, it might not have a firmware for the one or the other).
ESPurna supported devices list
Tasmota supported devices list
There are two ways to flash your device with either ESPurna or Tasmota – you can connect directly to the hardware pins or use a Tuya convert software (if supported) to flash a firmware without opening and soldering the device (I personally prefer this method, as some of the devices are very hard to open and I’ve broken one already).
Tuya convert with instructions
or the hard way to do it:
Flashing Tasmota (hardware connection)
Flashing ESPurna (hardware connection)
but I really recommend trying the Tuya convert method first.
Both ESPurna and Tasmota has full support for Home Assistant via MQTT broker.
Other devices I use, besides Zigbee and Wi-Fi
I’ve connected few more devices, unfortunately through their cloud services. But still I can use them in automations or control directly through the web interface.
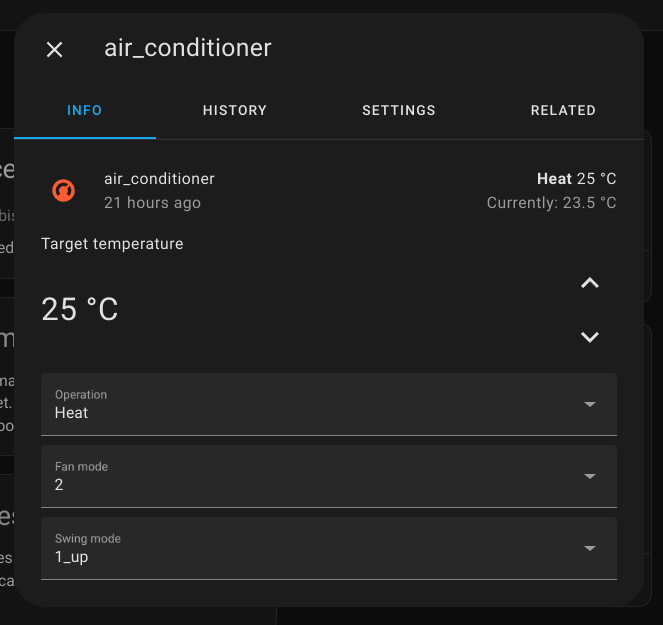
- Mitsubishi air conditioner through MELCloud integration:
- Adax wi-fi/bluetooth heater:
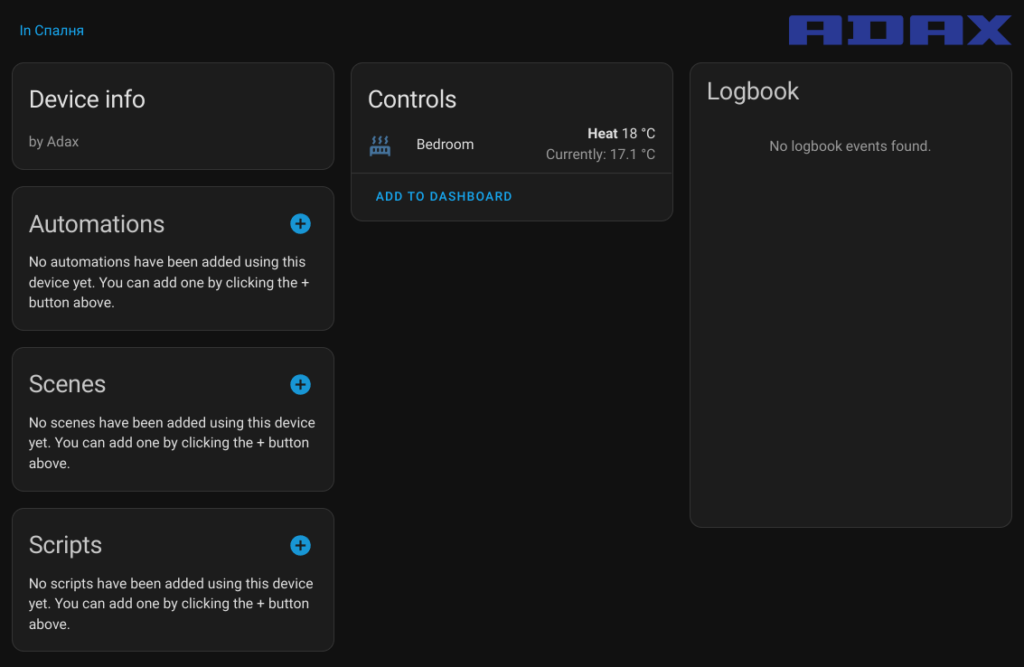
Both can be used in automations and can display consumed energy. However, I prefer to stay away of proprietary devices that require internet to work. Those are my only devices that require external connection (besides Pushover which I use for push notifications)
Visualization and history
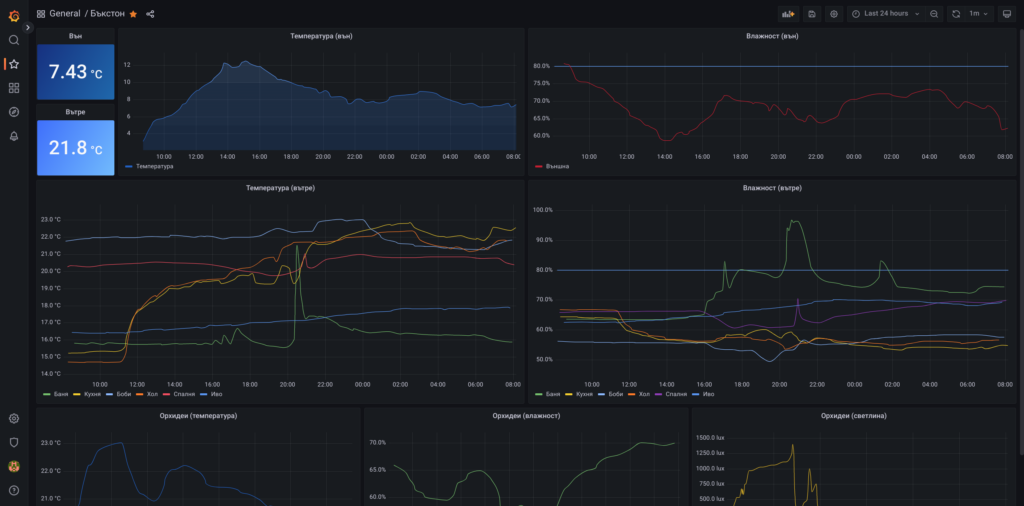
I’ve added Influx for saving all data from different sensors and Grafana for displaying it in a way I want. Both can be installed as addons in Home Assistant. Mine are installed in separate containers in Proxmox, as it’s easier for me to manage and backup them. I also use them for more than Home Assistant and it makes sense for me to separate them.
I won’t go into details how to set-up them, as it really depends on your use case. There are a lot of great tutorials, which can be followed.
Backup
For on-site and off-site backups I use the wonderful Home Assistant Google Drive Backup. Installation instructions are on their github page.

Conclusion
This was quick overview of how I use Home Asistant. I haven’t described specific details how to use every feature described, as everyone’s needs vary a lot and yours will be different than mine. But hopefully this gave you some ideas 🙂